
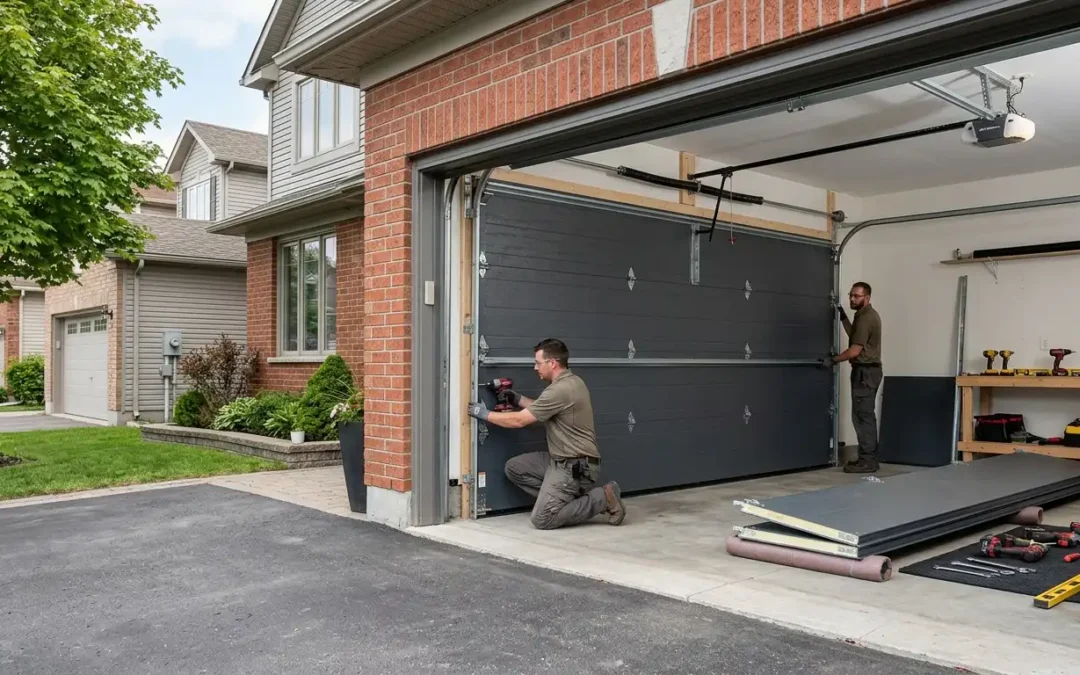
You’ve chosen your new garage door, scheduled the installation, and now you’re wondering what actually happens on installation day. Understanding the process from start to finish helps you prepare properly and ensures a smooth experience for everyone involved.
Professional garage door installation is a complex undertaking that requires precision, specialized tools, and safety expertise. While the end result, a beautiful and fully functioning garage door, seems straightforward, the process involves numerous steps that must be executed correctly to ensure safe, reliable operation for years to come.
Here’s your comprehensive guide to the garage door installation process in Ottawa, covering what happens before, during, and after your installation.
Before Installation Day
The Initial Consultation
Every professional installation begins well before the technicians arrive at your door. At Amigo Door, a garage door company ottawa homeowners have trusted for decades, we start with a thorough consultation to understand your needs, preferences, and the specific requirements of your garage.
During this phase, our team will:
- Take precise measurements of your garage opening
- Assess the structural integrity of walls and ceiling
- Evaluate your current opener (if keeping it) or discuss new opener options
- Review your preferred door style, material, and insulation requirements
- Discuss any special considerations like low headroom or non-standard configurations
- Provide a detailed quote with no hidden surprises
If you’re still choosing, our garage door collection and garage door customization tool help you settle on the right style, material, and features before we finalize the order. This consultation ensures that when installation day arrives, we have exactly the right door, hardware, and components for your specific situation.
Preparing Your Garage
A little preparation on your part makes the installation process faster and safer. Here’s what you should do before the technicians arrive:
Clear the work area: Move vehicles out of the garage and away from the driveway. The installation team needs clear access to the garage opening and space to work with materials and tools.
Create space inside: You don’t need to empty your entire garage, but clear at least 14 feet back from the door opening and one foot on each side of where the tracks will be installed. Move bicycles, trash bins, tools, and storage items to the back of the garage or temporarily outside.
Secure pets and children: Installation involves heavy materials, power tools, and components under high tension. For everyone’s safety, keep children and pets away from the work area throughout the process.
Ensure access: Make sure the installation team can easily reach electrical outlets if a new opener is being installed. Clear pathways to the areas where wall controls will be mounted.
Prepare questions: Write down any questions you have about operation, maintenance, or features. Having them ready ensures you won’t forget to ask during the post-installation walkthrough.
Installation Day: Step by Step
Step 1: Arrival and Setup
The installation team typically arrives during a scheduled window. They’ll introduce themselves, confirm the work to be done, and do a quick walk-through of the installation area. Professional installers bring everything needed for the job, so you won’t need to provide tools or materials.
Expect installation to take approximately 3 to 6 hours for a standard residential door, depending on:
- Whether an existing door needs removal
- The complexity of your new door
- Whether a new opener is being installed
- Any special circumstances like track modifications
Step 2: Removing the Old Door (If Applicable)
If you’re replacing an existing garage door, careful removal is the first order of business. This isn’t as simple as taking down a few panels. It requires expertise to prevent injury and property damage.
The process includes:
Disconnecting the opener: Before any physical work begins, the technician disconnects the automatic opener to prevent accidental operation. Electrical connections are safely secured.
Releasing spring tension: Garage door springs are under tremendous tension. Professional garage door technicians use specialized tools to safely release this tension before removing components. This is one of the most dangerous aspects of garage door work and a primary reason professional installation is recommended.
Sectional removal: The old door is removed section by section, typically starting from the top and working down. This prevents heavy panels from falling unexpectedly.
Hardware removal: All old tracks, springs, cables, rollers, and brackets are removed. These components are typically disposed of or recycled by the installation team.
Step 3: Inspecting and Preparing the Opening
With the old door removed, technicians inspect the garage opening to ensure it’s ready for the new installation:
- Checking that the door jambs are level and in good condition
- Verifying the header is structurally sound
- Confirming measurements match the new door specifications
- Making any necessary adjustments to ensure a proper fit
Reviewing the garage door materials and specifications for your door confirms the opening is ready. If issues are discovered, such as rotted wood framing or structural problems, these need to be addressed before proceeding, work our garage door professionals can handle before the new door goes up. Reputable companies will discuss any additional work and costs before continuing.
Step 4: Installing the New Door
Now the exciting part begins. The new garage door goes up section by section, with each component carefully installed and adjusted:
Track installation: Vertical and horizontal tracks are mounted to the walls and ceiling. Proper alignment is critical, since even small deviations can cause operational problems.
Bottom section first: The bottom panel is positioned in the opening and attached to the vertical tracks with rollers. This section includes the bottom seal that keeps out weather, pests, and debris.
Adding sections: Each subsequent panel is installed above the previous one, with hinges connecting the sections and rollers inserted into the tracks. The technician works their way up to the top section.
Spring system installation: The torsion springs (mounted above the door) or extension springs (mounted along the sides) are carefully installed and tensioned. This is precision work, and proper spring tension is essential for balanced operation and safety.
Cable and drum installation: Lift cables are attached to the bottom corners of the door and wound around drums on the spring shaft. These components work together to lift and lower the heavy door smoothly.
Hardware adjustments: All brackets, hinges, and rollers are tightened and adjusted. The technician ensures everything is secure and properly aligned.
Step 5: Opener Installation (If Included)
If you’re getting a new garage door opener installation, this happens after the door itself is in place:
Mounting the motor unit: The opener is secured to the ceiling, properly aligned with the door’s center.
Installing the rail and trolley: The rail assembly connects the opener to the door via a trolley mechanism.
Electrical connections: The opener is connected to power, and the wall-mounted control panel is installed, typically near the entry door to your home.
Programming: Remotes are programmed, and smart features (if applicable) are configured. This may include setting up smartphone connectivity or integrating with your home automation system.
Safety sensor installation: Photo-eye sensors are mounted near the floor on either side of the door opening. These crucial safety devices prevent the door from closing on people, pets, or objects.
We install quality LiftMaster openers, and if you want the connected features, our guide to smart garage door openers explains what app control and MyQ add.
Step 6: Testing and Calibration
No professional installation is complete without thorough testing:
Balance testing: The door is disconnected from the opener and manually operated to verify proper spring balance. This is the same garage door balancing check you can run yourself between service visits. A well-balanced door should stay in place when stopped at any point along its travel.
Cycle testing: The door is opened and closed multiple times using the automatic opener to ensure smooth, consistent operation.
Safety feature testing: The auto-reverse function is tested by placing an object in the door’s path. The door must stop and reverse immediately upon contact.
Photo-eye sensor testing: The infrared beam between sensors is interrupted to verify the door stops and reverses as required.
Limit adjustment: Travel limits are set so the door opens fully without straining and closes completely without slamming.
Step 7: Cleanup and Final Walkthrough
Professional installers don’t leave messes behind. The work area is cleaned, all packaging and debris are removed, and your old door (if applicable) is hauled away for proper disposal.
Before leaving, the technician will:
- Demonstrate proper operation of all features
- Explain manual release operation for power outages
- Review basic maintenance requirements
- Answer any questions you have
- Provide warranty information and documentation
- Ensure you know how to contact us for future service
After Installation: What You Should Know
The Break-In Period
New garage doors and openers may need a brief break-in period. You might notice:
- Slightly different sounds compared to your old door
- Minor adjustments in how the door tracks
- The opener “learning” the door’s weight and resistance
These are normal. However, if you notice grinding, scraping, or the door struggling to open or close, contact your installer promptly.
Ongoing Maintenance
Your new garage door will provide years of reliable service with basic maintenance:
Monthly: Visually inspect springs, cables, rollers, and hardware for wear. Listen for unusual sounds during operation.
Quarterly: Lubricate moving parts (hinges, rollers, springs) with a silicone-based lubricant. Clean the tracks but don’t lubricate them.
Annually: Schedule a professional tune-up to check spring tension, safety features, and overall system condition.
As needed: Clean the door surface with mild soap and water. Inspect and replace weatherstripping if it becomes worn or damaged.
Our garage door maintenance ottawa guide covers this full routine, and for comprehensive garage door repair and maintenance services, our team is always available through regular residential garage door service.
Understanding Your Warranty
Professional installation typically includes warranty coverage on both the door and the labour. Understand what’s covered:
- Manufacturer warranty: Covers defects in the door panels, hardware, and components
- Installation warranty: Covers workmanship and labour for a specified period
- Opener warranty: Separate coverage for the automatic opener and its components
Keep your documentation in a safe place and register your warranty if required by the manufacturer.
While some homeowners consider DIY installation to save money, the risks and complexities involved make professional installation the smart choice, and our full range of garage door services supports the door long after install day:
Safety: Garage doors weigh 150 to 400+ pounds. Springs under tension can cause serious injury or death if mishandled. Professional technicians have the training and tools to work safely.
Proper function: Incorrect installation leads to premature wear, poor operation, and potential safety hazards. Professionals ensure everything is calibrated correctly.
Warranty protection: Many manufacturers require professional installation to maintain warranty coverage. DIY installation may void your protection.
Time savings: A professional crew completes in hours what might take an inexperienced person an entire weekend, with better results.
Peace of mind: Knowing your door was installed correctly by experienced technicians provides confidence in its safe, reliable operation.
Why Professional Installation Matters
Ready for Your Installation?
At Amigo Door, professional garage door installation is what we do best. With over 40 years of combined experience serving Ottawa and the surrounding areas of service, our team ensures every installation meets the highest standards of safety and quality.
From the initial consultation through final testing, we guide you through every step of the process. Our mobile showroom service even brings samples directly to your home, and you can browse finished projects in our gallery for inspiration.
Contact us today at 1-613-821-2898 or visit our contact page to schedule your consultation. We’ll answer your questions, provide a detailed quote, and ensure your installation day goes smoothly from start to finish.
Get Expert Guidance for Your Project
Choosing between single and double garage doors involves balancing cost, energy efficiency, functionality, and aesthetics. There’s no universal “best” answer—only the right answer for your specific situation.
Our team at Amigo Door is ready to help you evaluate your options and find the perfect solution for your Ottawa home. We offer free consultations where we can assess your garage, discuss your needs, and provide detailed quotes for any configuration.
Contact us today at 1-613-821-2898 or visit our contact page to schedule your consultation. Let us help you make an investment that enhances your home’s value, comfort, and curb appeal for decades to come.
Recent Comments