
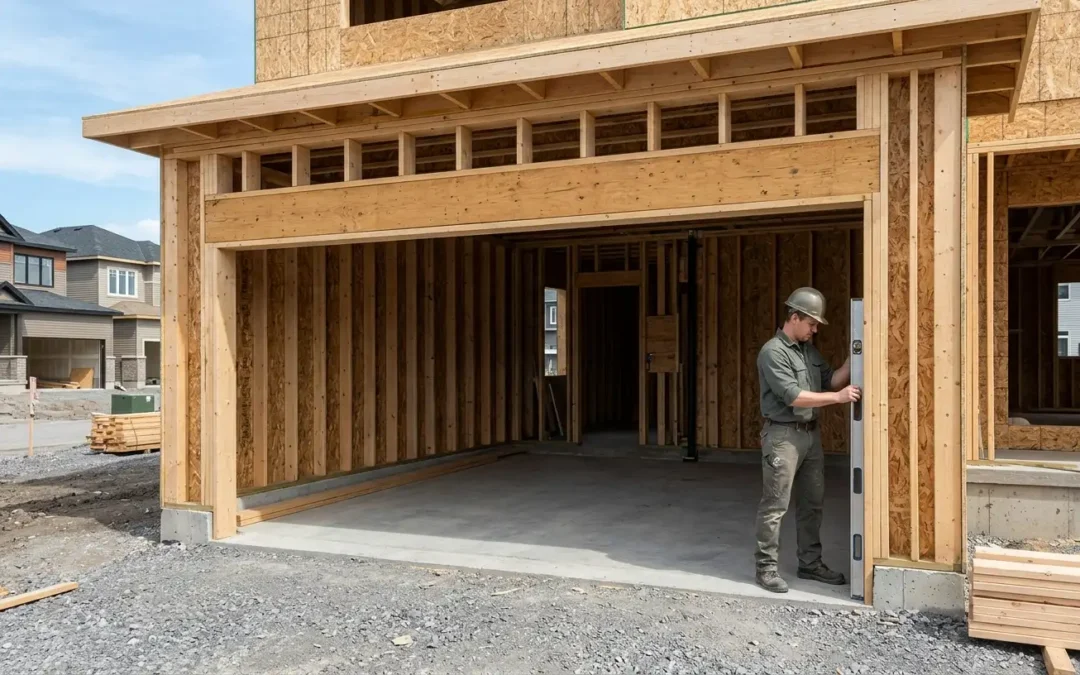
Everything about a garage door install rides on the opening it goes into. Frame it correctly and the door hangs square, seals tight, and operates smoothly for decades. Frame it wrong and you get a door that binds, leaks air through an Ottawa winter, or simply does not fit the ordered unit, which means delays and rework at the worst stage of a build.
This guide is for builders, renovators, and anyone framing a new opening rather than measuring an existing one. It covers the difference between a rough and finished opening, how to size the rough opening, the header, the clearances framing has to allow for, and where standard and custom openings differ. If you instead need to measure an opening that already exists to order a replacement door, our guide to garage door sizing in Ottawa is the better starting point. As the team behind Amigo Door’s work with builders and property managers, we frame and fit openings across the region.
Rough Opening vs Finished Opening
These two terms get used interchangeably on site, and the confusion causes real mistakes. The rough opening is the framed hole in the structure, measured between the framing members. The finished opening is what the door actually seals against once jambs, trim, and any finish are in place.
The door is specified to the finished opening, and the rough opening is framed around it to leave room for the jambs and for the door to operate. Getting the rough opening right during framing is what avoids expensive changes after the drywall and finishes are up. The rule on site is simple: frame to the door, not the other way around.
How to Size a Garage Door Rough Opening
Width and Height
As a common convention, the rough opening is framed to match the nominal door size: a 16 foot by 7 foot door is framed to a 16 foot by 7 foot rough opening, with the vertical jambs and header then installed around it. Different doors and hardware can vary this, so always confirm the rough-opening dimensions against the specific door’s spec sheet before you frame. A door model’s specifications and drawings give the exact figures, and when the opening falls outside standard sizes, our custom garage doors are built to the dimensions you frame to.
The Header
The header carries the structural load above the opening, and a garage opening is one of the widest spans in a typical house, so the header has to be sized to that span and load. Header sizing is a structural decision driven by the span, what sits above the opening, and local building code, so it should follow your engineered plans or an engineer’s direction rather than a rule of thumb. Undersizing the header shows up later as a sagging opening that pulls the door out of square, so it is worth confirming before the opening is closed in.
Jambs and Framing
The vertical jambs on each side of the opening give the tracks and the door something solid to mount to, so they need to be straight, plumb, and securely fastened. Mounting hardware eventually fastens into this framing, which is why a twisted or out-of-plumb jamb translates directly into a door that does not seal or run true. Solid, square jambs are the quiet prerequisite for a clean professional garage door installation.
Clearances That Framing Has to Allow For
A door needs room around the opening to operate, and framing is where that room is either provided or lost. Three clearances matter.
Headroom
Headroom is the space between the top of the finished opening and the ceiling, where the tracks, spring, and opener live. A standard setup needs roughly 10 to 12 inches, though low-headroom hardware exists for tight framing. If the ceiling or a bulkhead cuts into this space, it has to be identified at the framing stage, not discovered on install day.
Side Room and Backroom
Side room is the space on the wall beside the opening for the vertical tracks, usually a few inches per side. Backroom is the depth from the opening back into the garage for the horizontal tracks and the opener. Too little of any of these forces special hardware or prevents the door from fitting at all, and the opener in particular needs its backroom planned, which ties into the garage door opener installation at the end of the job.
Framing for Standard vs Custom Sizes
Standard door sizes exist precisely so framing can follow predictable dimensions, and for most builds that is the efficient path. Choosing between one wide double opening and two single openings is a framing decision as much as a design one, since it changes the header span and whether a centre post is needed, a trade-off our guide to single vs double garage doors walks through.
Older homes, infills, and non-standard builds often fall outside standard sizes, and here the door is built to the opening rather than the opening forced to a catalogue size. That is where framing to a custom dimension pays off, and our custom garage doors handle those openings across the full range of our residential garage doors.
Framing for Commercial Openings
Commercial and industrial openings vary far more than residential ones, from standard bays to oversized loading docks and high-traffic entrances. Larger openings mean longer header spans, heavier doors, and hardware that has to be planned into the structure from the start, so framing coordination matters even more. Our commercial and overhead doors cover those larger openings, and the framing should be planned around the specific door type and how the building will use the bay.
Getting It Right Before the Door Arrives
The cheapest time to catch a framing problem is before the door is on site. Confirm the ordered door size against the framed rough opening, verify headroom, side room, and backroom are all present, and check that the opening is square and the jambs are plumb. A clear opening at delivery is what lets installation and opener setup run on schedule, the full sequence of which our guide to the garage door installation process in Ottawa walks through. Framing that is confirmed in advance is also what keeps the project off the kind of cost overruns covered in our garage door installation cost guide.
Common Framing Mistakes
A few errors come up again and again. Framing the rough opening to the finished-opening dimension (or the reverse) leaves the door either too tight or too loose. An undersized header sags over time and pulls the opening out of square. Out-of-plumb or twisted jambs stop the door sealing evenly. Forgetting to account for headroom, side room, or backroom forces special hardware or a redesign late in the build. And skipping a check of the spec sheet means framing to an assumed size rather than the actual door. Each of these is easy to avoid at the framing stage and expensive to fix afterward.
The Bottom Line
Garage door framing is where a smooth install is won or lost. Frame the rough opening to the specific door’s spec, size the header to the span and load per your plans, keep the jambs square and plumb, and make sure headroom, side room, and backroom are all present before the door arrives. Get the opening right, and the door that goes into it hangs true, seals tight, and runs cleanly through our seasons.
Planning a build or renovation and want the opening framed right? Contact Amigo Door at 1-613-821-2898 or visit our contact page to coordinate your project.
Recent Comments